Some of Tom's Origami Gallery
Geometrics and tessellations
Photo credits: Nancy Rose Marshall. All photos were taken on May 10, 1999.
Please note! Right now I have no diagrams or instructions for the
following models. However, if you read the accompanying text carefully
and stare at the pictures long enough, you'll probably be able to figure
them out for yourself. (I hope!)
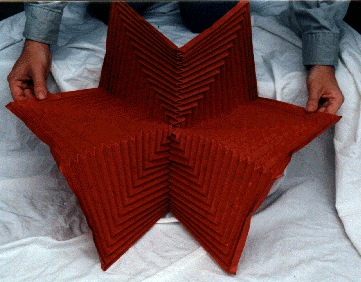
Above and below are two views of my "nested hexagonal collapse" model.
(Note:
I'm sure many others have also discovered this model, as it is
a very natural extension of the classic hyperbolic paraboloid and
Jeremy Shafer's BARF Newsletter flyer.) It is folded from
a large hexagonal piece of Elephant Hide. The model is basically
a series of concentric hexagons with "zig-zag" creases coming from
the center-most hexagon out to the midpoints of the paper's sides.
It can be collapsed in many different ways, and the way shown above is
nice and iso-area. (See Origami for the Connoisseur for an
explanation of iso-area.) The model can be collapsed flat into a
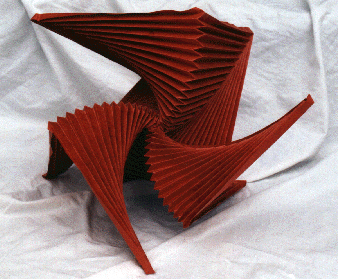
six-armed star shape. However, it can be much more fun to twist
the model into interesting shapes, as I've done below.
(And yes, I used a bit of tape in the back of the model to make it
hold this shape. But if I had wanted to I could have just wet-folded
it into that shape, so quit your nit-picking!)
Now, the cool thing is that the boundary of the hexagonal paper in the
nested hexagonal collapse model is exactly the same as the
boundary of an iso-area closed-back hexagonal twist. So what, you
ask? Well, hexagonal twists can be tessellated, which means that
the nested hexagonal collapse should also be able to be tessellated!
By "tessellated" I mean that we should be able to fold more than
one of them into the same sheet of paper, arranging them properly
so that they fit next to one-another exactly. (Another way to think
about it is that we're "tiling" various copies of the model's crease
pattern together, in the same way that you would tile your
bathroom floor with tiles. Here, the tiles would be hexagonal...)
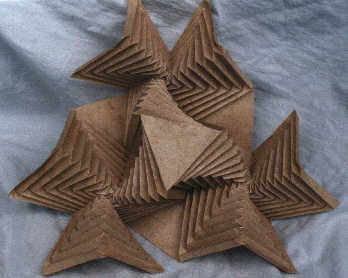
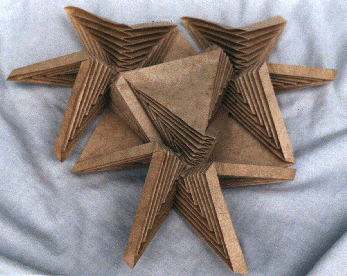
The above and below pictures are two views of three nested hexagonal
collapses folded into the same sheet of paper. In order to
make the collapses "behave" I chose to offset them a bit
from each other, leaving a triangular "gap" of paper in between
the three which is clearly visible in the center of the model.
Like the original model, this tessellated version collapses
flat, and the picture below shows the model being partially
collapsed. This tessellation could be repeated forever, but it
takes a loooong time to make, even with just three of them!
I do have a Diagram for the crease pattern of this
model, if you want to take a look.
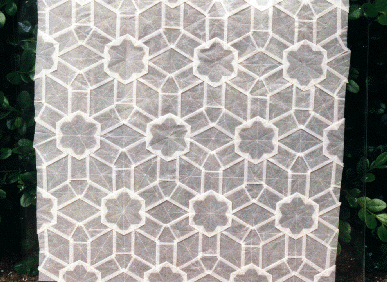
This is a more standard origami tessellation, folded from white
glassine. I made it in the spring of 1995. The underlying tessellation
that it is based on is the 3.6.3.6 Archimedian tiling, and this one
shares the same symmetry group as this tiling. (Note: not all
origami tesselations have the same symmetry group as their
parent tilings.) This one was designed using two fairly simple
collapses, one hexagonal and the other triangular. Of course,
one could chose to view this tessellation as a tiling of rhombi,
but that's just the dual of 3.6.3.6, so whatever.
Return to Gallery Page


